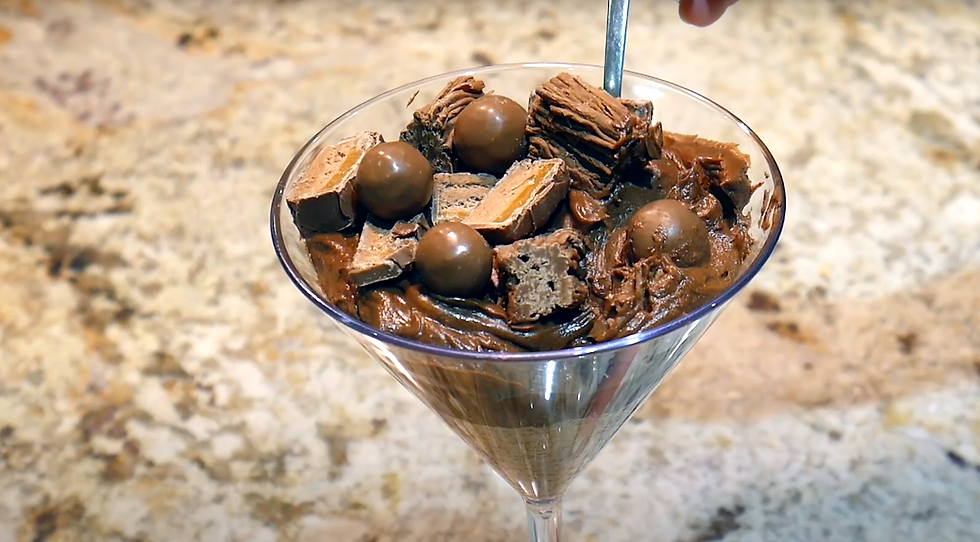
Junkyard Cheesecake | Recipe
- Gig House Kitchen

- Dec 20, 2024
- 3 min read
Updated: Jan 10
A no bake chocolate cheesecake that’s hiding a special surprise…

Looking for something to share with your guests this holiday season? Why not try this moreish no bake Chocolate Junkyard Cheesecake. Not only is it incredibly easy, but it can also be “baked” ahead of time, saving you much needed time.
Plus, it’s a huge crowd-pleaser!
When my sister and I were in High School, Mummy Trisha, (as our school friends liked to call her) would whip up this delicious treat for our sleepovers and our friends would talk about it for days after.
What’s not to like, honestly?
You’ve got a crunchy and buttery biscuit base, creamy chocolate cheesecake filling, all topped with your favourite chocolates and sweets. It’s customisable based on what you like best, letting your guests create their own for an added bit of fun!
Perfect for dinner parties and special occasions, find the recipe below and try it for yourself!
What you need for this recipe
A small saucepan (to melt butter)
Rolling pin / food processor
A large microwave-safe bowl
Wooden spoon / Spatula
A sharp knife
Balloon whisk
Cocktail glasses or ramekins (to serve)
You will also need a variety of plates, small bowls, and cutlery on hand for this recipe to weigh ingredients into, portion spices, etc.
Watch the video
Ingredients
For the base:
120g (4oz) Digestive Biscuits
60g (2oz) Melted Butter
For the cheesecake topping:
150g Dark Chocolate (at least 70%)
60g Caster Sugar (or to taste)
350g Mascarpone cheese
200ml Heavy / Whipping cream
Extras:
2 Flakes
2 Mars Bars
1-2 Malteasers (Bags)
*or chocolate bars of your choice
RELATED: Checkerboard Biscuits | Recipe
Method
Base:
Place 120g of digestive biscuits into a sandwich bag and use a rolling pin to gently break them into crumbs (you can also use a food processor for this step)
Melt 60g of butter in a saucepan, take off the hob and then pour the biscuit crumbs into it.
Stir together until the biscuits resemble damp sand and then split the mixture between 4–6 serving dishes (we used Cocktail glasses in the video)
Put the glasses in the fridge to chill
Cheesecake filling:
Using a large microwave-safe bowl, melt 150g of dark chocolate in the microwave on LOW POWER in 15–20 second increments until the chocolate is fully melted (chocolate melts easily in the microwave so do it slowly and on low heat)
Once melted, stir 60g of caster sugar (or to taste) into the chocolate until combined
Add in the 350g mascarpone cheese and stir until fully combined with the chocolate
Using a whisk, whip the 200ml of heavy cream and then fold it into the cheesecake mixture to lighten it. Mix careful so you don’t deflate the cream too much.
Split the mixture between your serving dishes, layering over your biscuit base
Leave to chill in the fridge until you are ready to serve
Decorations:
Cut chocolate bars of your choosing (we used Flakes, Mars Bars and Malteseasers in the video) into bite-sized pieces.
Once chilled, decorate the cheesecakes with the chocolate pieces and serve.
Final comments
For a little bit of extra fun, why not put your chocolate pieces into bowls and let your guests decorate their own cheesecakes at the table.
This is a great activity for children (as well as parents!)
Here at the Gig House Kitchen we want to help new or inexperienced home cooks to learn basic food prep skills and recipes in a comfy and fun environment.
With over 40 years combined experience, the GHK team can take you from a novice who burns water to an experienced, natural cook.
Join us for new recipes and learn to cook from scratch.
If you have any ideas for recipes, or would like to see anything particular covered on the channel, make sure to leave a comment.
Make sure to give us a like, comment and subscribe over on YouTube
You can also follow us on instagram @GigHouseKitchen
© Obsidian Elephant Productions
Need something to listen to while you cook?
The Fiction Framework is an audiobook podcast narrating original fiction, posting across audio platforms, such as Apple, Spotify and YouTube.


Comments